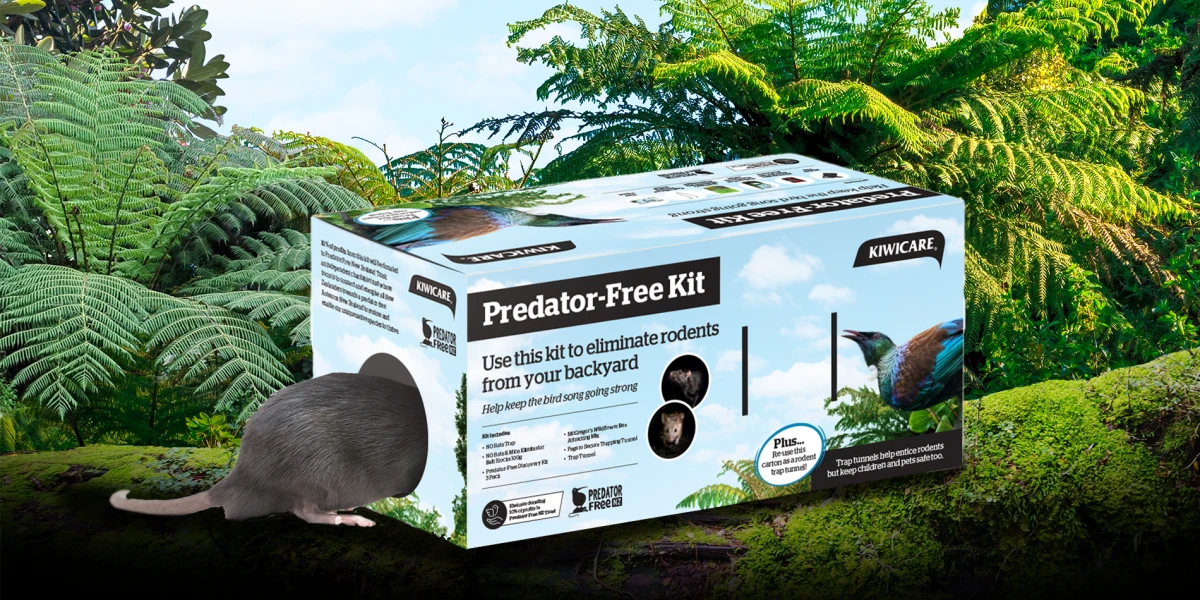
Everything you need to know about using your Predator-Free Kit
Congratulations on doing your part to help save NZ's native birds. To help you on your way here's everything you need to know to get your kit set up both correctly and safely.
Putting Safety First
Like with all rodenticides - when working with these products it’s your responsibility to make sure that pets, children and other non-target animals are not harmed by accessing the toxic baits or traps. Please make sure the Predator-Free Trap Tunnel Box is placed away from areas that children and pets can access. Trapping Tunnels provide some safety, but there's still a slim chance that a determined child or pet can get their paw or hand inside. So, choose the location where you place your Predator-Free Kit carefully. If you plan on using the kit, baits or traps at a later date it’s also important to ensure that they are stored securely and safely.
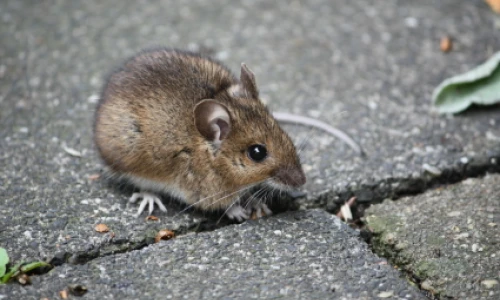
Step One: Rodent Detection
WARNING! Contains Peanuts
Place a rodent detector card in your backyard where you think rodents might be active. These can be folded in half and nailed to a tree, or fence, or secured anywhere the card will stay in place.
The cards contain a peanut-based, non-toxic lure to attract rodents. If rodents are present, they’ll chew on the cards leaving bite marks. The bite marks will help you identify what type of rodent it is. Make sure you monitor the card every few days to see if there has been any activity. Once you have confirmation of rat or mouse activity you can set up your bait station and/or traps in the right area. Use the pictures of bite marks provided in the kit to find out who’s living in your backyard.
Interpretation: See a summary of Pest Detection Chew Card Interpretation for more detailed information and interpretation of marks from other animals.
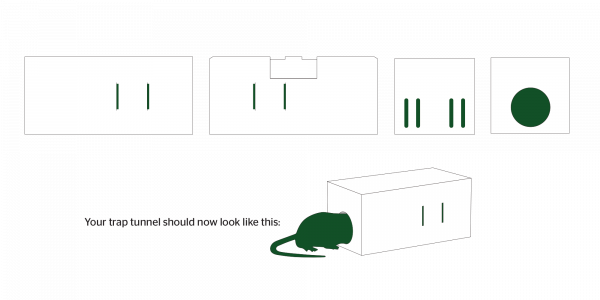
Step Two: Setting up your Trap Tunnel
With very minimal effort, your Predator-Free Kit conveniently converts into a trap tunnel. Trap tunnels are important to ensure non-target species are kept out, meaning only target species (e.g. rats and mice) will get in. Rats and mice like to crawl into dark, enclosed spaces, making trap tunnels attractive as they are the perfect place to hide.
Pop-out all nine perforated cut-outs. Cut-outs will simply allow light and air in, encouraging the rodent to investigate.
Step Three: Placing bait in the bait station
Baits must always be used in a bait station or trap tunnel. This keeps bait safe from pets and children and prevents weather from damaging your bait
It is important to wear gloves when setting your trap for your safety and to ensure no human scent is on the bait; otherwise rodents will be less likely to approach.
- Place one bait block in a plastic bag and fix a peg through the bait bag and the base of the tunnel (securing the bait is very important). This will secure the bait to the tunnel to ensure a rodent simply nibbles on the bait and doesn’t take the bait away with it. There are holes in the back corners of the trap tunnel that the pegs can be pierced through.
- Inspect bait at least every 7 days.
- Replace bait as necessary – it may take up to 2 weeks to control a significant rodent problem.
Step Four: Setting your trap and where to place it
The Victor Modified Rat Trap is an effective lightweight trap.
It has a bait shroud that ensures rats interact with the trap and lure from the most effective direction and are despatched humanely. This trap meets the NZ Animal Humane standards (NAWAC). This means the trap has been tested for its humaneness to the animal, ensuring a quick, humane kill.
Rodents like to run along fences, walls and skirtings. So, setting a trap tunnel up against a wall increases the chance of catching the rodent. Trap tunnels can be used both indoors and outdoors.
Here’s how to set the trap:
- Wearing gloves, lift the white bait shroud, which is hinged at the front, to reveal the trigger spike. Add a lure to the trigger spike so that it is firmly in position; an easy and appealing lure is peanut butter.
- Replace the bait shroud. If present, remove the small staple that holds the setting pin in place before use (not the u staple at the rear of the trap).
- Move the setting pin back so it lies off the rear of the trap. With the trap on a firm surface, pull the kill bar back against the spring until it is flat along the rear of the trap. Keep fingers away from the front of the trap.
- While holding the kill bar down, carefully move the setting pin back over the kill bar and insert it in the notch in the rear of the lure trigger so that when the kill bar is released the setting pin holds the kill bar in place and the trigger is set.
- Keeping fingers out of the front kill zone of the trap gently place the trap in position. The traps should be set in the rear of trap tunnel to exclude non-target animals such as Weka.
- Ensure the lid of the trap tunnel is securely closed before placement.
Predator-Free Kit leaflet
Have you lost your leaflet - Don't stress. You can access a digital copy of it below:

Kiwicare’s Easy 1-2-3 Steps to Rodent Control
Pests , Animal Pests , How to DIY , Rodents
Easy 1-2-3 Step Guide to Rodent Trapping
Animal Pests , Pests , How to DIY , Rodents , Pests in the News
How to identify rodent chew marks
Rodents , Animal Pests , Pests in the News